Posts

Showing posts with the label Autotrailer

What happens under the sheets......

Image
31/10/2022 Since our burst of activity in the summer, and despite the lack of updates we have been far from inactive. Our first target was to get the galvanised sheets on the newly erected section. The formers that support the sheets had to be made and added.  Then we received our first setback. The sheets needed to be cut to the exact size and although we had previously used the guillotine at Williton this was no longer available, so we had to investigate other ways of cutting the sheets. Luckily, we managed to source a local facility who were more than willing to help so we continued to progress this work. Having been cut to size they then have to be drilled and the holes 'dimpled' on the top and bottom and countersunk on the vertical edges. Above: Batons fitted, and wood dimpled to accept the sheets.  Above: Sheets being drilled prior to dimpling or countersinking Above Dimpling process underway. Four sheets were completed and attached using stainless steel screws, about 70...

'Moving on' 07/09/2022

Image
 Having caught our breath following the very busy Steam Fayre a few weeks back we have now started to fill the gaps on the body framework recently constructed. The 2 side rails that support the galvanised sheeting on the lower carriage sides have been made and fitted and work has also progressed in the workshop sorting and squaring the remaining uprights for the last section. We have established that we will need to obtain 4 more for the luggage end door jambs. 115mm x 90mm x1800mm so we'll be shopping for those before long. Today we have also marked out and started drilling the first 2 of the 2mm galvanised side sheets  for the 'railway' side of the carriage. About 60-70 holes on each sheet. The pilot holes are the easy ones  

More progress to report 19/06/2022

Image
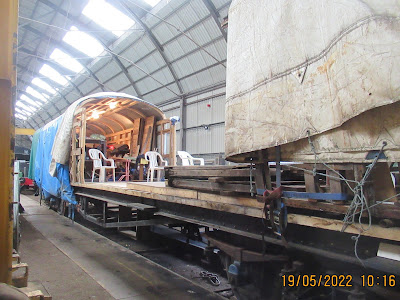
Yesterday saw the big push to get the forward partition permanently into place. A 3 dimensional jigsaw including top heavy pieces 9ft square and weighing 2-3cwt (3 mtrs and 125kilos for the metric minded) having to be manoeuvred into position then dropped vertically into place with no mechanical assistance proved quite a challenge. However, as you see below, we did succeed along with some more attention to the roof spacer timbers and the trial fit of all the doorway timbers that just need some further small fettling .

Getting there.......................16/06/2022

Image
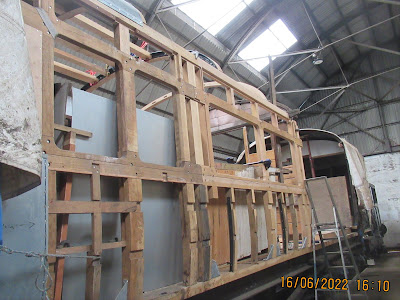
We're getting towards the end of our  undercover period and whilst we may not have achieved absolutely everything we had hoped for we have made good progress having also encountered a few unforeseens, what railway project doesn't? Not least discovering the top of the Luggage end entrance vestibule partition had a broken joint which required some serious dismantling that we hadn't planned for. See pictures  below. However today we came within a 'stones throw' of refitting the Drivers side  entrance vestibule partition along with many of the roof supports that fit between the hoops fitted. We are hoping to sheet the carriage down making allowance to complete the unfinished work without too many problems. The latest pictures are shown below. Hope fully there will be some updated ones in the next few days so please look back again soon. Roof support fitting underway Partition trial fitted. Some small fettling required Half of the repaired roof beam.

Here we go................19/05/2022

Image
Today we eagerly started work on the assembly of our kit of parts for section 3. All in all a good day with most of it going together without too many problems and paying dividends of the trial fitting in our joinery shop. The pictures below show the Before (top 2) and After (bottom 2) situation with good  progress to report but with plenty more to achieve over the next few weeks. Our thanks go to all involved in the recent big shunt at Williton.  Please check back regularly for all the updated news.  

07/04/2022 Easier with some floor to stand on................

Image
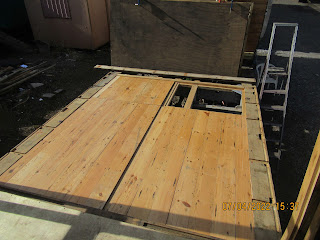
Whilst we await our slightly overdue arrival in the shed we have been making the most of the sunny, if blustery weather to fit some of the flooring on to the newly assembled section base. A layer of 20mm tongue and groove is topped be 25mm plywood. The lower picture show the first section of ply being eased into place in lateral seating bay 3 and the under floorboards almost completed in the longitudinal seating bay adjacent to the entry vestibule. We're pleased with the progress after one or two minor hiccups to start. Watch out for more progress soon.  

Roof Hoops and Door Handles 29/10/21

Image
29/10/2021 Further progress on the assembly of section 3 requires a further 3 Roof Hoops to be manufactured, and due to the imminent increase in electricity prices and the fact the there is a high demand for the said power for several hours we took the opportunity to save a few pounds before the 1st November. For those who are new followers of this Blog and all things Auto 169 this will be a new process to you although we have now produced 8 of these and will probably need a further 5 or 6 before we reach the Luggage end. Briefly they are made of 4 laminations of 3"x1/2' ash. The individual laminations are steamed for about 2 1/2 hours before being removed and clamped to the former. The first lamination is allowed to cool for about 20-30 mins until 'set' when its unclamped and lamination 2 is added. This process is repeated a total of 4 times when they are removed clamped together and then left for a couple of weeks to fully dry out prior to gluing. The pictures below ...

Section 3 floor framework

Image
 16/09/2021 Following on from yesterday's successful operation to remove the tempory cover from the carriage we followed up with a very productive day first fitting the framework of section 3 of the carriage. We were confident the section in isolation was 'good to go ' but until today we had not had the opportunity to see how well it fitted the existing bodywork. Well, by about midday just about all our fears were a distant memory and we were very happy with the outcome. The photographs show most of the woodwork in question with one or 2 small pieces omitted that still require final finishing. Because we can only mark the final fixing holes from underneath we will need to address that before final fixing can take place. We will then be able to erect the bodywork sides before tackling further roof hoop manufacture.                                                ...

Nothing to see here..............................

Image
15/09/2021 Have you passed our carriage at Williton and wondered what lies beneath the blue and white tarpaulins? Today we have exposed the truth..............nothing! Well, not exactly nothing. When we needed to vacate the Swindon shed we needed to ensure we protected the work we had already completed on the bodywork so we hastily constructed a tent from wooden poles supplied by one of our workers and obtained a large tarpaulin to cover it and protect it from the ravages of the West Somerset weather. today it was time to dismantle it and start preparing for section 3 to be added to the existing 2 parts already there. The driving end partition wall was also extracted and moved back beside the luggage end partition temporarily to allow us more working space. These will both be removed over the next few months to allow all of section 3 to be added. Watch out for further updates coming soon, but in the meantime here's a pic of the space created today and a picture of a piece of the ...

One down, 3 to go

Image
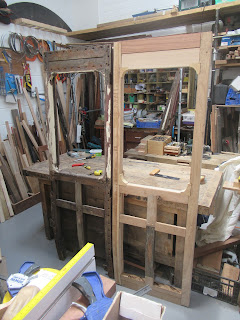
05/09/2021  Door construction update. Last Saturday saw the completion of the first of 4 doors for the Luggage compartment of Auto 169. Built virtually from scratch (you'll spot the original piece) this door has been constructed by copying the best of the remaining original and although it will require fettling and detail added the major construction is complete. There is a photo of it next to the original for comparison but remember that is the best of the 4. Next, we will construct the second of this pair which will include a 'closing' stile. This will be the one that closes first and the first door closes against it. Next time I will include some pictures of the door handles that our resident engineer has expertly created from a range of spare parts. Hopefully, we will be able to show our recent progress to all those visiting the WSR gala on 1st-3rd October. Come and find us at Williton yard.   The original door used as a pattern With droplight frame inserted for info Ma...
Image
  Luggage Door Construction update. 25/08/2021 Progress on the manufacture of the first door stiles continues. Below you can see the first pair of stiles looking amazingly similar and the original for comparison. The bottom cross-member has also been made and fitted. Work will now continue with the remaining components Work has also continued on the seatback cushions along with the preparation of the main carriage frames to receive section 3 woodwork. The joining scarf joints on the soleplates has been completed and section 4 (the last quarter) has been partially marked out for mortises to be cut. We have also reached an agreement with the WSR Plc to store 169 at Williton for a further 2 years. Hopefully, we will be able to show our progress at the upcoming WSR Gala Weekend at the beginning of October.

Not bitter and now not twisted

Image
 A few weeks back we reported that we had recovered the pair of 9"x3" oak sole plates for the final section of the carriage. These had been gently seasoning for 4-5 years in our workshop and whilst not expecting them to be perfectly straight (oak rarely is) one of the two was quite badly warped and twisted. One of the lessons learned from earlier sections was to ensure the scarfing joints between sections is manufactured prior to erecting the previous section. So we needed to attempt to straighten the timber to allow the joints to be made. Our previous experience steaming these big timbers has proven quite successful provided the process is given plenty of time. So out came our 12' steaming box originally designed for making roof hoops and the necessary steam supplies by way of 2 paint strippers plugged in and set in action. The offending piece of oak added and left for 5 hours to gently warm. The above picture shows the extent of the twist After 5 hours the twist had sub...